

One of the great update from AppVolumes 2103 (aka 4.4) is now you can install only App Volumes Tools and package applications offline from a simple VM on VMware Workstation for example and produce the same package for App Volumes on Prem (.vmdk file) and for App Volumes on Azure (.vhd files). So exactly the same package for both environment.
So let me describe how I created my “Capture and Build” VM, how to capture and import your applications….
I – Build a “Capture and Build” (CnB) VM :
Using VMware Workstation, I created a brand new VM, initially for ThinApp, but it’s to use it for App Volumes as well, so I’ll be able to use it for both packaging environment.
The characteristics of my VMs are as follow:
- 2 vCPU and 4Gb RAM
- 1 SATA drive for System of 60GB
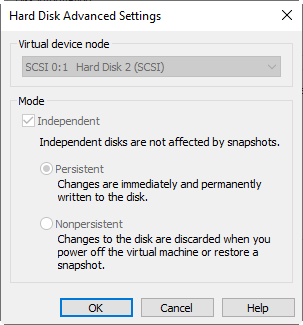
- 1 SATA drive for ThinApp and repository of 100GB but set as Independent / Persistent so not affected by snapshot, this way I can keep ThinApp project safely and also move App Volumes apps on it. When I revert back to snapshop, all data on this drive are preserved.
I only installed : VMware Tools, ThinApp 5.2.9 and App Volumes Tools 4.4. Once apps installed:
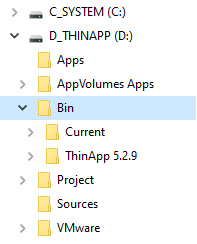
- I moved ThinApp binaries in D:\Bin\ThinApp 5.2.9 and D:\Bin\Current
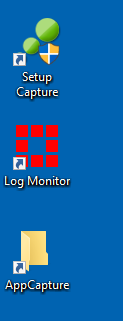
- I created shortcuts from D:\Bin\Current to the desktop (so in case of ThinApp update, I only have to put new version in this folder without the need to change shortcuts and create a new snapshot. I also add an Explorer shortcut of “C:\ProgramData\VMware\AppCapture” in the desktop
- And finally run VMware OS Optimization Tools to remove all unwanted apps and settings …
- Once everything is ready, shutdown and take a snapshop..
II – Capture an application:
Capturing an application is pretty easy :
- From “C:\Program Files (x86)\VMware\AppCapture” (don’t use C:\Program Files (x86)\CloudVolumes\Agent\appcapture.exe). run the following command (note : type appcapture /? for a list of all options and examples):
appcapture.exe /new "My Apps"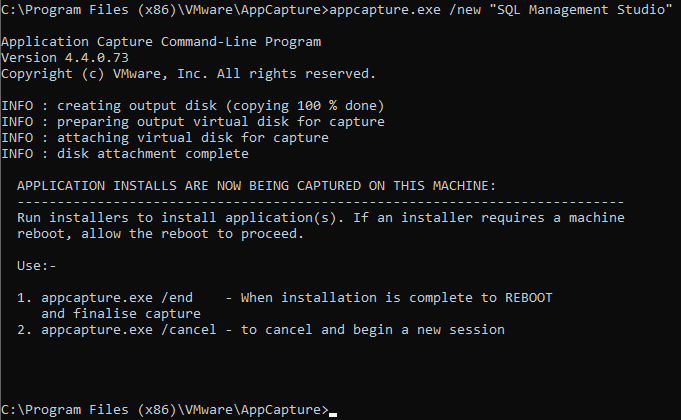
- Install your application… reboot if required…
- Once your application is installed and you set the basic settings, run the following command :
appcapture.exe /end- Your VM will automatically reboot and finish capture process
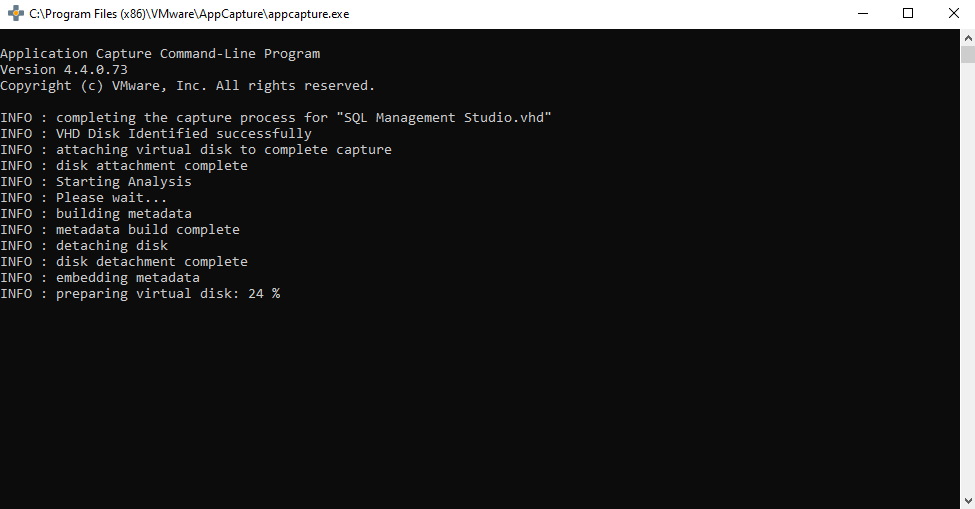
Once the capture is done, you’ll see 3 files : <apps name>.json, <apps name>.vhd and <apps name>_workstation.vmdk
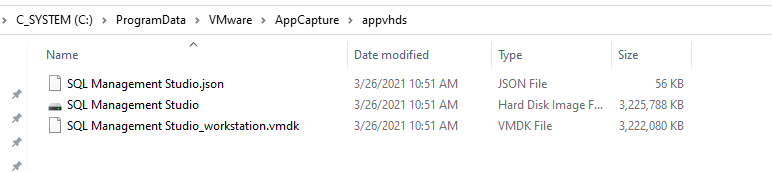
- Copy files in a safe place (eg. D:\Apps)
- Shutdown your VM and revert to previous snapshot
III – Import your application in App Volumes 2013 (4.4) On-Prem
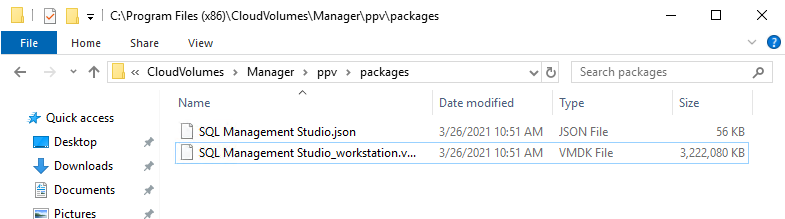
- Now the application is packaged, copy both .json and .vmdk into “C:\Program Files (x86)\CloudVolumes\Manager\ppv\packages” folder (by default the “packages” folder doesn’t exist so you have to create it)
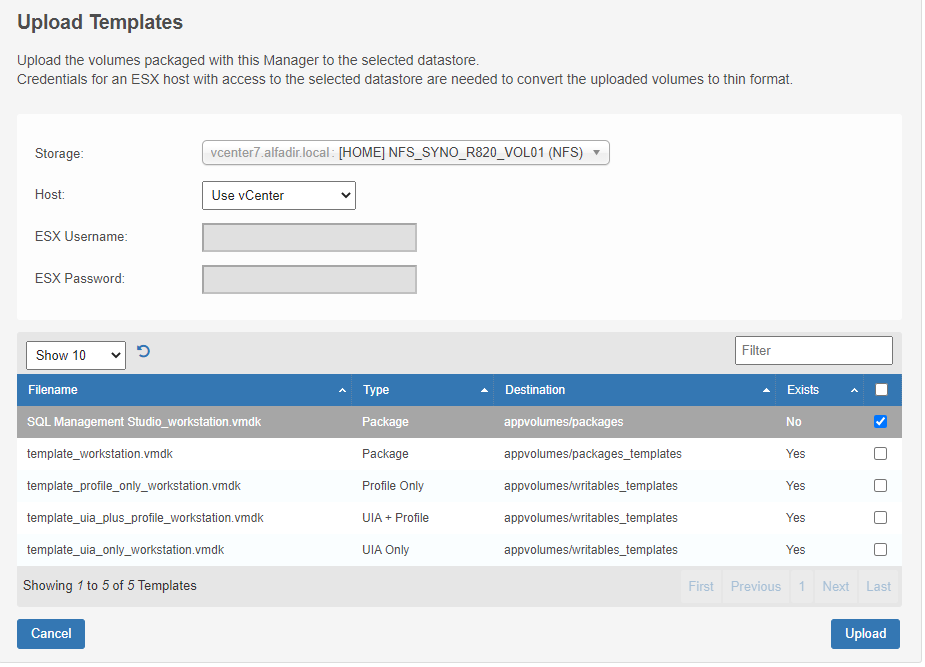
- From App Volumes admin, go to “Configuration\Storage” and select “Upload Templates”:

- Select the target datastore, tick the application and click Upload..
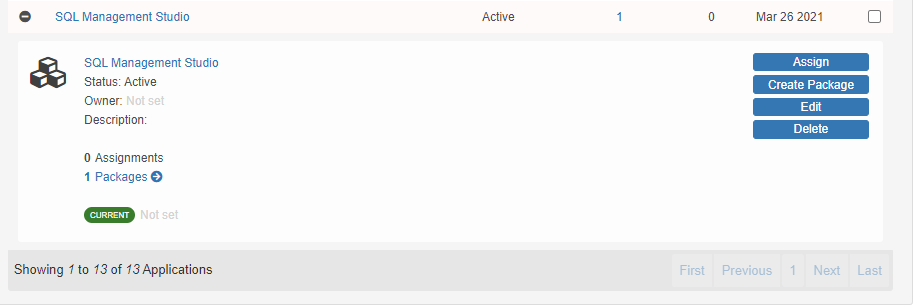
- Once uploaded , go to “Inventory\Application”, and can assign it Users/Groups
- You can now delete files from “C:\Program Files (x86)\CloudVolumes\Manager\ppv\packages“
Here a video gently provided by Hilko Lantinga 🙂
That’s all folks 🙂

Great write up Eric!
I think it’s worth mentioning that you could use ESXCLI vmkfstools command to clone Workstation type of vmdk file to vSphere standard – that would allow App Volumes Manager to pick up the package directly from the datastore, and not from the ppv folder.
Hey
Do you have an example of the CLI command to convert the VMDK file to allow direct datastore upload?