Eric Monjoin
Staff Consulting Architect but also pilot, spending time in front of my computer or flying in the air...

Lets talk about End User Computing Because we worth it ...

Home Lab Upgrade

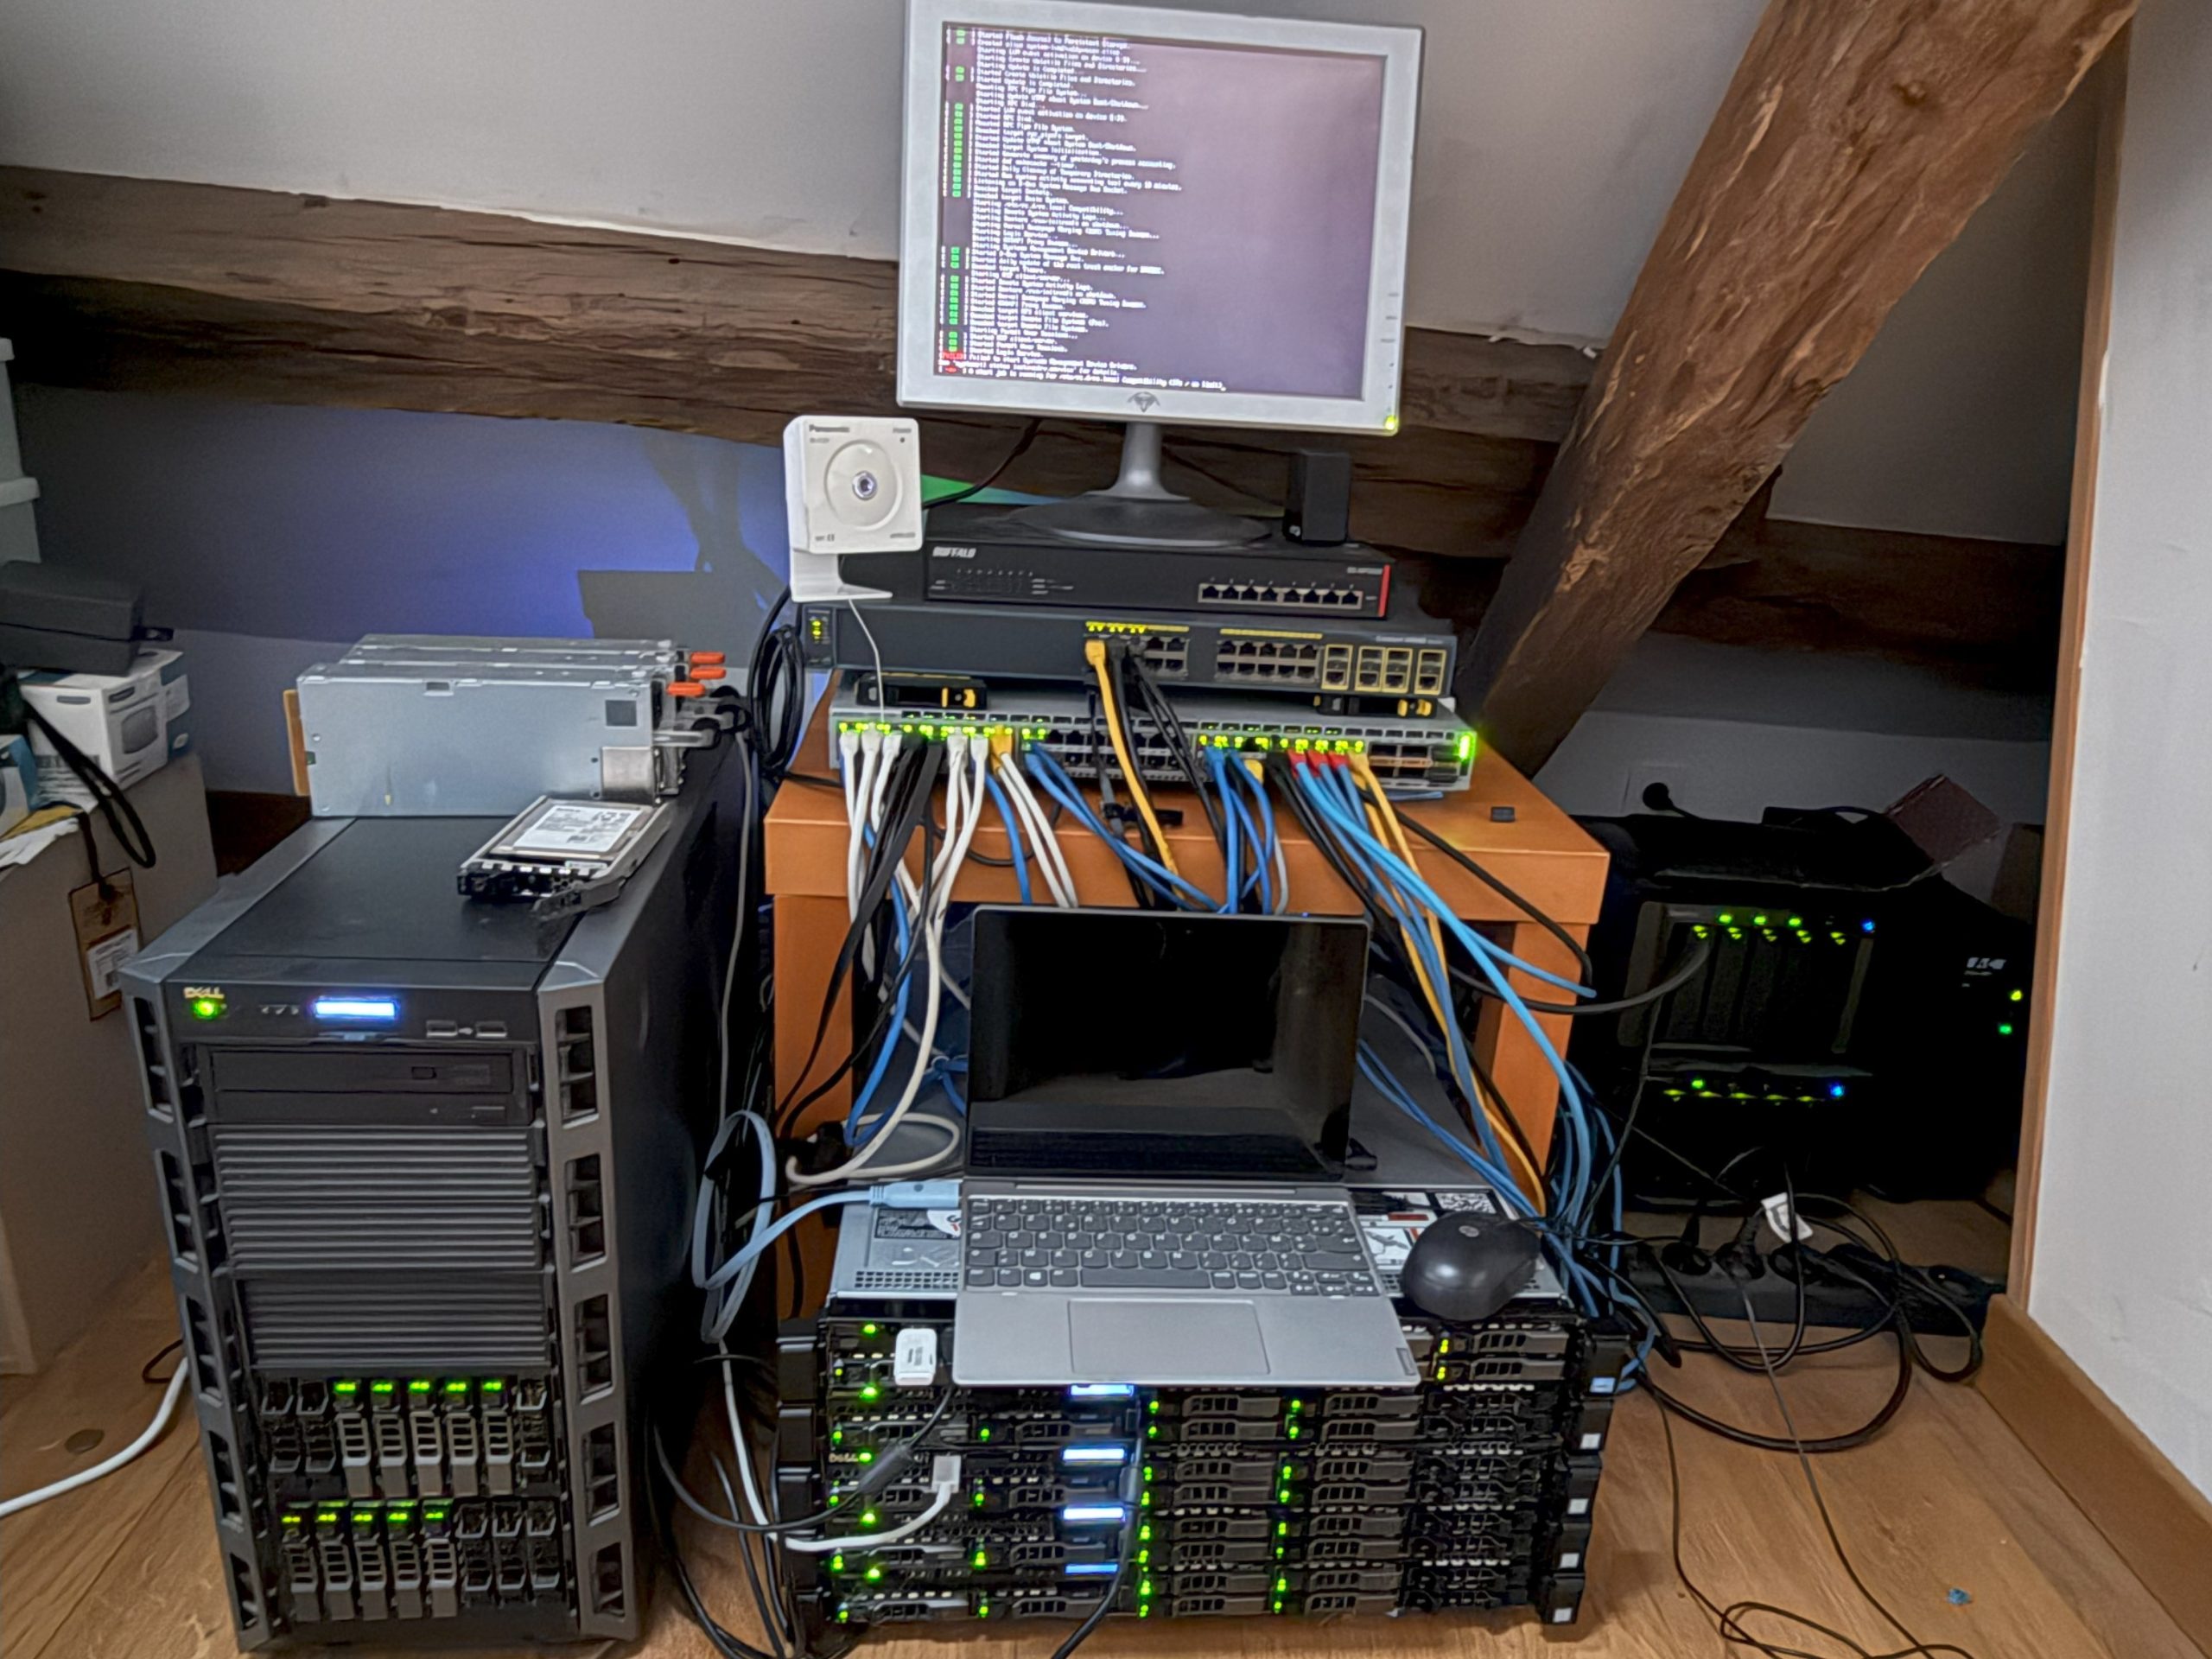
Recently I did a full Home Lab upgrade, removing my old Dell R820 + Dell R720 and Intel NUCs for some bunch of server, given me the possibility to have much more capacity and performance than before.

Thanks eBay as it was my main provider, so here the new configuration :

vSphere 8 – vSAN cluster composed of :
– 4 x Dell R630 (E5-2667 v4 @ 3.20GHz and 192GB RAM each)
– 4 x 480GB SAS SSD for Cache
– 8 x 1TB SATA SSD for Data

vSphere 8 – Single server :
– 1x T420 (E5-2440 @ 2.40GHz and 164GB RAM) – 5x 900GB SAS HDD (RAID-5) + 5 x 480GB SAS SSD (3PAR SDD converted to run on Perc H710P)

1x Nutanix CE 2.1 :
– 1x R620 (E5-2630Lv2 @ 2.40GHz and 192GB RAM)
– 1x 73GB SAS HDD for Hypervisor
– 2x 480GB SAS SSD for CVM
– 4x 900GB 15K SAS HDD for data

1x Switch Arista DCS-7050TX-72Q 48x 10GBase-T
Used as my Core Switch

1x Switch Cisco 2960G
Used as a specific LAN connected to my secondary Internet router

1x NAS Synology DS1511+DX510-2
– 5x 1TB HDD SATA – RAID 5
– 3x 1TB HDD SATA – Synology Hybrid RAID
– 2x 1TB SSD SATA – RAID 0)

Omnissa Dynamic Environment Manager 2412 is GA

What’s New?

  • Omnissa Dynamic Environment Manager. As part of our transition to Omnissa, Dynamic Environment Manager (DEM) has been refreshed. You will notice visual updates across all DEM suite components, including the Management Console, SyncTool, Application Profiler, Helpdesk Support Tool, and product installers.
  • Version History. Configuration versioning and restore is a robust feature that provides flexibility and control over your configuration files. It simplifies the recovery process from unintended changes, providing a reliable method to track and manage updates to your configurations. See Version History.
  • Help. To facilitate the search for Help, the DEM Management Console and Application Profiler now has an Admin guide link. Clicking the Admin Guide button will take you to the product’s administrative manual.
  • Horizon Smart Policy. To align with the Horizon agent changes, Two Horizon Smart Policy settings regarding the Blast protocol are amended. The “Max frame rate” support is increased to 120 fps. The policy list no longer includes the Switch Encoder.
  • Run-once flag files enhancement. A new configuration setting that allows you to control the creation of fallback ‘.flag’ files, providing flexibility and customization to your workflows. By default, the system maintains the existing behavior, ensuring compatibility with current setups and preventing disruption for the installed base. However, with this new setting, you can quickly turn off the creation of fallback files when they are not needed, reducing clutter and aligning with your operational requirements.
  • Latest Operating System Support. Dynamic Environment Manager now supports Windows 11 24H2 and Windows Server 2025.
  • Updated Components. This release updates all the components, including the main component, Application Profiler, Helpdesk Support Tool, and SyncTool.

App Volumes Apps On Demand – Certificate Issue

Horizon Suite 2212 is GA since last week and of course I already upgraded all my lab with this new release.

I was particularly interested by the Application on Demand so directly manage App Volumes application on RDS with all entitlement done within the Horizon Console.

The principle consist of adding App Volumes server in Horizon and then assign it to an “Automated” farm.

Now when you add you App Volumes Server into Horizon, you’ll certainly need to import App Volumes certificates into the “Trusted Root Certification Authorities” folder and then restart Horizon Services on all you Connection Servers.

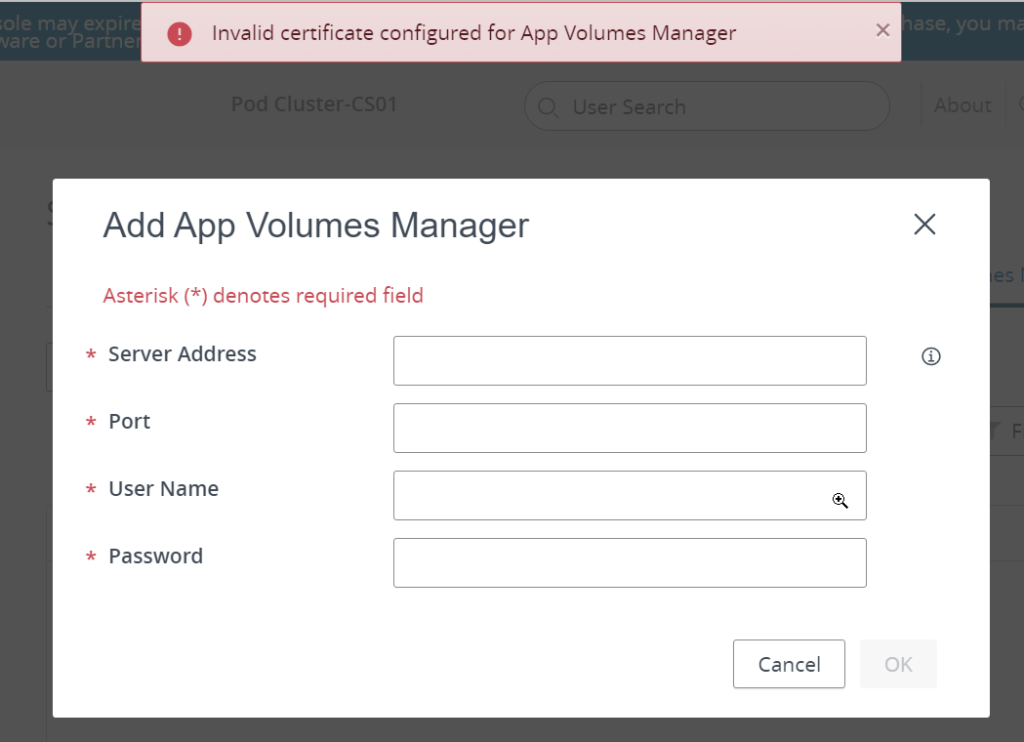
Now even if doing that, you can encounter the following issue, with Enterprise signed certificate :

I had this issue on my lab, so to get it solved, I had to generate a new certificate for my App Volumes server using a new Template.

This is how to do it ….

Continue reading…

Horizon Cloud Connector 2.3.0 – Connection Server Monitoring Service – Failed

Some time it happens that Connection Server Monitoring Service appears to be failed (but it worked before) and we see a lot of restart attempts.

There’s many reason for this to happen (like proxy error etc..) but I personally first try this workaround and it worked all the times :

1 – SSH to Horizon Cloud Connector using ccadmin and then do a su – to login as root
2 – Go to /opt/container-data/data/csms/store/keep
3 – Do a copy of csms-config.json to csms-config.json.bak
4 – Edit csms-config.json

# su -
# cd /opt/container-data/data/csms/store/keep
# cp csms-config.json csms-config.json.bak
# vi csms-config.json

5 – change cmsTenantConfig to : null and set lifeCycle to : “PAIR”

{
  "baseConfig" : {
    "version" : "1",
    "csmsIdentity" : "038eeb6a-159c-4ee5-89d0-xxxxxxxxxxxx",
    "salt" : "df3e8624-2478-4d6f-bd94-xxxxxxxxxxxxx",
    "keyLength" : 128
  },
  "cmsTenantConfig" : null,
  "applianceConfig" : {
    "podType" : "VIEW",
    "podCapacityType" : "GENERAL",
    "podId" : "4cfd1101-1f73-4691-aa39-xxxxxxxxxxxx",
    "podName" : "Cluster-HZN-01",
    "podLocationJson" : "{\"p\":[43.29695,5.38107],\"id\":\"b32f5cf4-7413-4877-92c4-xxxxxxxxxxxxx\",\"n\":\"Marseille, France\"}"
  },
  "lifeCycleConfig" : {
    "lifeCycle" : "PAIR",
    "lastUpdateTimestamp" : 1668683604710
  }
}

6 – restart csms :


# kubectl get pod -n cms-system
NAME                   READY   STATUS    RESTARTS   AGE
csms-79df9554f-jcprn   1/1     Running   0          27m
# kubectl delete pods -n cms-system csms-79df9554f-jcprn

After a few minutes, it should be green again… if not open a ticket 🙂

PowerShell : Automatically Expand Writable Volumes

One of my customer raised an issue about managing writable volumes as they are mainly used by developers who are unable to restrain their desires to fill disk with tons of data and can’t do some clean up 🙂

The problem of course is that the writable volume grow up to no free space and unfortunately the user is not aware of that as the “ReportSystemFreeSpace” Reg Key works only for App Volumes 2.x and not App Volumes 4.x

The following script can be used manually or integrated with Task Scheduler but requires App Volumes Server 2206 (4.7) to handle “requested_mb” parameters. You can use it with previous version but you don’t know if a request to expand disk was previously initiated.

Disclaimer : The script it self is not supported by me or VMware so use it at your own risk however it’s using official VMware API for App Volumes, and thank to Chris Halstead as his initial script helped me a lot (https://github.com/chrisdhalstead/appvolumes-expand-wv)

Continue reading…

ADFS with VMware Unified Access Gateway (UAG)

This article talks about configuration of ADFS with VMware Unified Access Gateway without the use of Workspace One Access.

There’re two use cases here to configure ADFS with Unified Access Gateway

  1. Use Case #1: ADFS as MFA, so users first authenticate using ADFS, and then authenticate using standard credential to get the list of available resources (desktop or apps)
  2. Use Case #2: ADFS for single authentication method, so users will authenticate once with ADFS and then will connect to VDI VMs or published apps without the need to enter any other credentials. This use case of course required VMware TrueSSO to works

Initial configuration is the same for both and to make it short here the different steps required:

  1. Change Expiration Period for Service Provider Metadata
    1. https://my-virt.alfadir.net/index.php/2022/01/12/change-the-expiration-period-for-service-provider-metadata-on-connection-server/
  2. Deploy UAG
    1. Configure Edge Service and specify a Connection Server fqdn (not the load-balancer)
    2. Check connection is working
  3. Connect to <federation fqdn> and save the FederationMetadata.xml file
  4. Import FederationMetadata.xml in UAG (Upload Identity Provider Metadata)
  5. Configure UAG for SAML or SAML and Passthrough auth methods
  6. Specify Identity Provider
  7. Download SAML Service Provided .xml file
  8. Configure ADFS
    1. Add a new Relying Party Trusts
    2. Specify UAG SP .xml file as source
    3. Configure Claim Issuance Policy
  9. Connect to UAG as “client”
    1. Auth using ADFS
    2. Auth using AD credential

Now if we want to go further and implement ADFS with TrueSSO:

  1. Generate SAML IdP Settings
    1. Import signed cert or use Generated one
    2. Copy Content of Download IDP Settings
  2. Configure Horizon Connect Server for SAML auth with UAG and ADFS
    1. Connect to admin console of Horizon Connection Server
    2. Add SAML Authenticator for UAG
      1. Mode Static
      2. Past Content of UAG Download IDP Settings
      3. Change EntityId if required
    3. Add SAML Authenticator for ADFS
      1. Mode Static
      2. Past Content of FederationMetadata.xml
  3. Enable TrueSSO for UAG and ADFS
    1. Using vdmUtil, enable both authenticator
  4. Check True SSO connection
    1. Connect to UAG as Client
    2. Once authenticated to ADFS, the list of available resource appears, and you can login without any other cred

That said, let see with some nice pictures how we do that :

Continue reading…

Get Horizon Cloud Managed desktop and apps on WS1 Access

Here a recent behavior I met at a customer and on my own labs, :

Normally and that was the case few months ago, when you entitled VMs or Apps (whatever it was on Azure or On-Premise but “Cloud Managed”) they were automatically available on the configured WS1 Tenant, and especially if you asked to create one from the Horizon Universal Console rather to attach an existing one.

Look like there a recent change, and some pre-requisites are required (mentioned in the documentation but to be honest the documentation is a little bit abstruse). So, if entitlements are not any more synchronized, or you don’t see any entitlement on WS1 you need to check 2 things :

1 – Ensure you gather appropriate User Attributes for WS1 :

In Identity & Access Management  \ Setup \ User Attributes make sure you have the 3 following attributes (none of them are by default):

  • objectGUID
  • sid
  • netBios

2 – Ensure you mapped these attributes with the right Active Directory Attribute

In Identity & Access Management \ Manage \ Directories, edit the Sync parameters of your AD and go to Mapped Attributes, make sure you mapped them as this :

Workspace ONE Access AttributeActive Directory Attribute
userPrincipalNameuserPrincipalName
objectGuidobjectGUID
sidobjectSid
netBiosmsDS-PrincipalName

Once done, just synchronize your directory and it works.

Change the Expiration Period for Service Provider Metadata on Connection Server

Well, this procedure is in the documentation, but I put it here so I can access it more quickly.

You need to do this when you have to use SmartCard or Certificate through UAG as an example.

Procedure

  1. Start the ADSI Edit utility on your Connection Server host.
  2. In the console tree, select Connect to.
  3. In the Select or type a Distinguished Name or Naming Context text box, type the distinguished name DC=vdi, DC=vmware, DC=int.
  4. In the Computer pane, select or type localhost:389 or the fully qualified domain name (FQDN) of the Connection Server host followed by port 389.For example: localhost:389 or mycomputer.example.com:389
  5. Expand the ADSI Edit tree, expand OU=Properties, select OU=Global, and double-click CN=Common in the right pane.
  6. In the Properties dialog box, edit the pae-NameValuePair attribute to add the following values:.
  • cs-samlencryptionkeyvaliditydays=number-of-days
  • cs-samlsigningkeyvaliditydays=number-of-days

In this example, number-of-days is the number of days that can elapse before a remote Connection Server stops accepting SAML assertions. After this period of time, the process of exchanging SAML metadata must be repeated

App Volumes 4.5 – Error “Failed to connect Manager Service..” when registering additional App Volume Manager servers

During the installation of App Volume 2111 (4.5), if you try to register additional App Volumes Managers, you would certainly failed with the following error message :

And if you look at in the nginx.log, you would see the following error :

2021/12/06 22:15:08 [info] 5200#5264: *72 client sent plain HTTP request to HTTPS port while reading client request headers, client: 192.168.0.67, server: 0.0.0.0, request: "POST /cv_api/sessions HTTP/1.1", host: "appvol4mgr01.domain.dom:443"
Continue reading…